I just finished a week long intensive anatomy sculpting course, Andrew Cawrse's level 3 anatomy workshop, Dynamic Anatomy. Because the classes are relatively new, I thought I might report about the class in case anyone out there is interested in learning about dynamic anatomy, whether the knowledge is applied digitally or traditionally.
On the first day we set up the model, Cason, in a kneeling pose. We quickly gestured in his form on a small armature as best we could. After a few hours of this, Andrew asked us to take our gestures off the sculpting stands and set them aside for later use at the end of the week. I thought this was a great idea and feel very happy to have gone through the exercise, although in entering the class I was not aware that we needed at this point to purchase a second, bigger armature and would have liked to know that before hand so as to be mentally prepared for the additional cost. I personally was not too miffed about this aspect since I sculpt on a weekly basis and can always use more armatures. However, I can see how others might have been a little surprised if they were new to the sculpting world. So, if you are to take Dynamic Anatomy, just know that you will need to purchase TWO armatures and probably all of the specialized tools, which end up being about $500 extra, a pretty significant cost added on to the $1500 base fee. HOWEVER, I want to emphasize here - TOTALLY worth it. (Maybe it was mentioned in the description of the class and I missed it.)
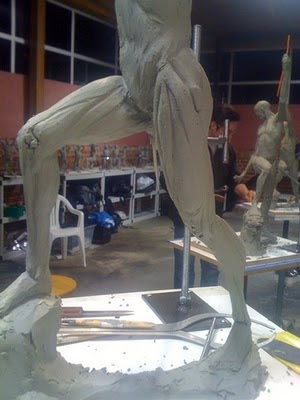
Anyway, after the first exercise, the model was posed in a standing position with a leg up on a box to show bending of the knee, a twist in the rib cage and the opposite arm up high, to demonstrate motion in the arm, rib cage and hips. We then spent the afternoon and the morning of the second day sculpting out and measuring the general proportions of the figure as best we could, which is MUCH faster than what I am used to! However, this was necessary since there was so much ground to cover in anatomy lessons. On the afternoon of the second day we began the good stuff: carving out muscle groups and indicating them on the body, specifically the legs. You can see here I didn't finish.


After we tackled the boney landmarks and muscle groups of the legs, we spent a pretty significant amount of time on the third day learning about the scapulae. Andrew and his assistant, Eric -who also assists mega alpha sculptor Richard MacDonald and is an awesome sculptor in his own right- both expressed that knowing the scapula bones are extremely important in understanding how the figure works. The reason being that the bone, although attached to the clavicle, moves and shifts as the arms and rib cage move. In addition to that, a lot of complicated muscles of the back attach to these bones, causing further confusion. However, if you become intimately familiar with the shape and function of the scapulae, the rest becomes easier to understand, and helps in making a figure look far more believable. Great lesson!
We proceeded by measuring the boney points on the model with our calipers, and sculpted out the exact shape of both scaplua as best we could. This was no easy task since both were in different positions on each side!

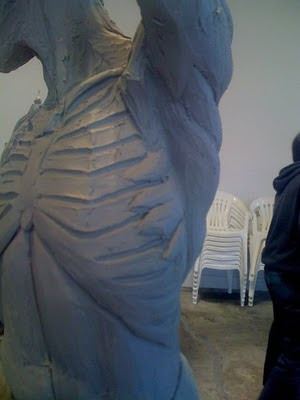
After about an hour or so of this, with Andrew's approval, we then laid clay on top of the scapulae and drew out the musculature of the back. Unfortunately I didn't take a photo of my drawn out muscles. Here is the initial stage, though.
 During this portion of the class, I found it very helpful to refer to one of Andrew's reference figures, which he sculpted and sells on his site, www.freedomofteach.com. He also had a skeleton in the class for reference that had painted landmarks indicated in red and blue to show various points of origin and insertion of muscles on the skeletal figure. Very useful!
After the back, we moved on to the hands and feet (or perhaps we did those before the back?) We learned some simple measuring tips and technique for sculpting the hands and feet, which were incredibly useful. We only spent about an hour on each, so what you see here is the best I could do while rushing to get the planes and all the anatomy in before moving on to the next subject.

 Next subject was the rib cage and muscles of the torso. PIECE OF CAKE compared to the back.
The first step was to locate the top, bottom and width of the rib cage using the calipers to measure the model, Cason (who, btw, is a FANTASTIC model - awesome dancers body). Once we indicated these points on our sculpture, we then carved out the planes of the ribcage and drew in the ribs, sternum and clavicle. (pardon me if I'm spelling these wrong, btw)
 Once the ribs came in, we then put in the serratus anterior muscles on top. We were very lucky to have a model that had extremely well developed serratus muscles, which he believes might have developed from being on a wrestling team. Makes sense, since these become flexed to stabilize the torso.
 next came the external obliques, which attach to the serratus anterior muscles.
 and after that, the pectoralis major muscles of the chest, which originate from the clavicle and rib cage and tuck in underneath the deltoids.
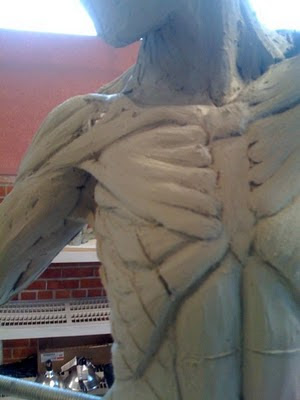
Here is my finished, well, half way finished, rib cage with the muscles. Behind my sculpture you can see assistant Eric's sculpture. Having Eric there was extremely beneficial to the class; we all referred to his gorgeous sculpture often to check against for errors in our own.


On Thursday evening, Andrew and his assistant Eric weighed the sculptures in order to calculate how much clay we used, which was then added to the invoice and billed accordingly. Mine weighed 20 pounds.
Finally the afternoon of the last day. We spent this block of time learning how to finesse the figure, add skin and refine the details. Andrew showed us a technique of adding bits and pieces of fat between the muscles and then brushing on turpenoid to melt the clay just slightly to create smooth skin. I worked on the leg and knee:
 And here is my semi finished sculpture! Yay! The great thing about this is that I can continue to work on it at home referring to charts and books. I hope to get it to a more completed state so I can continue to have a better understanding of how the anatomy works on a dynamic figure. The only unresolved issue I have after the class is where to put it in my studio living room. I don't think Andrew can help me with furniture rearrangement. My sculpt has ended up sitting on my floor next to my art desk. It would be better to have him on a sculpting stand of my own so I can continue to work on him.
 All in all, I highly recommend taking Andrew Cawrse's anatomy classes. I had also intended to take the next two classes, which sounded really amazing, too: Mike Murnane's creature anatomy class and Damon Bard's character sculpting class. I think regardless of what application you are eventually using these for, it would be worth the trip, the cost, the time and effort, given that you are studying with masters in the film industry whose knowledge is based in pure traditional art education, a tradition which still struggles to stay alive.
Having said that, since this is my personal blog, I should explain that my interest in sculpting lies in a love of the craft, the beauty of the human and animal form, and very deep passion for artistic exploration. While in the class, someone asked me (and everyone else) what I wanted to do with sculpting, to which I replied with heart felt sincerity, 'nothing in particular!' After a career in illustration for animation and games, as well as a failed attempt to get a fine art painting career off the ground, I have come to a choice in how I view being an artist. That is, if I attach an expectation to where I want to eventually go with a particular skill, i.e. a GOAL or specific JOB or gallery life, I will somehow stumble on career obstacles, create a lot of frustration for myself, call into question who I am, how 'good' or 'not good' I am, and subsequently dilute the passion of whatever it is that drives me to create for MYSELF.
These days, I intentionally continue to practice the things I love in my off hours from work, without any expectation of the eventual outcome at all. I can do this partially because I already AM a working artist with a pretty stable career. So what more do I need? My personal work is just that - personal, inspired, not at all attached to money or a living, and entirely from that pure stuff within the heart that loves to create. These days, the only personal mantra I keep is: develop my passion and the rest will take care of itself. I look forward to seeing what happens, and in the mean time I am happy. Kinda like the little pink flower girl illustration below. :)


