In my previous post I finished the first under painting layer, the open grisaille, as part of my instruction at Sadie J. Valeri's Advanced Open Studio. After the open grisaille dried, I moved on to the closed grisaille.
When I first learned about the Flemish method's multi-step process, I did not understand the reasoning behind making a neutral tone underpainting, thinking it laborious, especially coming from an alla prima direct painting background where painting is quick and results immediate. However, after going through the steps, doing a lot of reading and research, talking with Sadie, visiting museums, seeing Sadie's paintings and other classical realist paintings, I have come to realize my painting education has been incomplete. The closed grisaille has been pivotal in not only understanding value ranges and creating luminous color, but also in opening my mind to the incredible painting processes that existed before Impressionism.
Closed Grisaille
The purpose of creating an under painting is to bring the values, (the black and white tonal range) of the subject closer to reality. Sadie described it to me as becoming 50% closer to reality with each successive layer that we work on. In the first layer, the open grisaille, we broke down the shadow vs. light areas. In the second layer we make a full value opaque tonal painting, which acts to prepare for the color layers and, in addition, aides in creating luminosity and softness in the color stage.
From Adrian Gottlieb's online glossary: "Underpainting: Also called dead coloring, under painting was once one of the most commonly used techniques in oil painting but fell into almost total disuse among contemporary painters.
From the beginnings of oil painting, under painting has been an essential stepping stone which permits the painter to rapidly define composition, lighting and the atmosphere of his or her work. Under painting is the painter's guide through an often long and laborious process that allows the painter to develop a clear vision of the overall sense of the painting although it is usually entirely covered by successive paint layers.
[Generally] under painting consists of painting a monochrome version of the final painting. Under painting is part of a step by step method that was common practice among European painters and is still taught at ateliers and academies teaching historic techniques and methods today."
Richard Frederick Lack: "A mixture of Flake White, Ivory Black or Mars Black and the addition of a small amount of Raw Umber for warmth are all the pigments necessary for a grisaille study." ***note: in Sadie's studio study we are using titanium white, burnt umber, and ultramarine blue.
There is a pre-order of Jon deMartin's dvd on closed grisaille painting, which promises to be be an excellent resource. Check out the preview HERE. (available for purchase on July 3rd, 2012 - I think I will order this one!)
Historical
During the 12th through the 13th centuries and possibly earlier, grisaille painting was used in stained glass mainly as a decorative addition to the colored glass. Some grisaille painting was also used in narrative panels in churches throughout Northern countries such as France, England, the Netherlands.

Two Grisaille Panels, 1320–1324
French; Paris, from the Chapel of Saint-Louis, north aisle, royal abbey of Saint-Denis
Pot-metal and white glass, silver stain.
French; Paris, from the Chapel of Saint-Louis, north aisle, royal abbey of Saint-Denis
Pot-metal and white glass, silver stain.
At this time, grisaille was also used in the southern countries of Europe in plaster fresco painting to imitate bas relief sculpting in everything from churches to civic buildings, particularly in Italy.

The 15th century Flemish oil painting method incorporated grisaille, as discussed in the previous post by Jan van Eyck, also a period sometimes referred to as "Early Netherlandish Painting".
Later, grisaille was used by many of the 19th century French academic painters, like Ingres, as in the example below, who were intrigued by Flemish painting methods.
Later, grisaille was used by many of the 19th century French academic painters, like Ingres, as in the example below, who were intrigued by Flemish painting methods.

Odalisque in Grisaille, ca. 1824–34
Jean-Auguste-Dominique Ingres (French, 1780–1867)
Jean-Auguste-Dominique Ingres (French, 1780–1867)
Today, many modern Realist artists also make use of the grisaille. It can be beautiful in and of itself; some artists use a combination of grisaille and glazing. For study purposes it is a useful method for training the eye to see value ranges, and is often taught for cast painting and figure painting in a classical ateliers. Check out this link for a beautiful Colleen Barry partially painted closed grisaille with the open grisaille exposed underneath, HERE.
***********************************
Recipe: 2 parts linseed, 1 part odorless turp

Use either Turpenoid or Gamesol brand Odorless Mineral Spirits. There are many linseed oils available.

************************************
When I first mixed up my value string, I made the values much too cool, using far too much ultramarine blue in the mix. Sadie told me that the value string should lean more towards burnt umber rather than ult blue. Apparently when the under painting is too cool it will create an unattractive pasty effect that is difficult to deal with in the color stage. Also, in a cool North light situation, the light areas will always be cool while the shadows are warm; the warm tinted underpainting ensures the shadows will always have "life" and warmth.
************************************
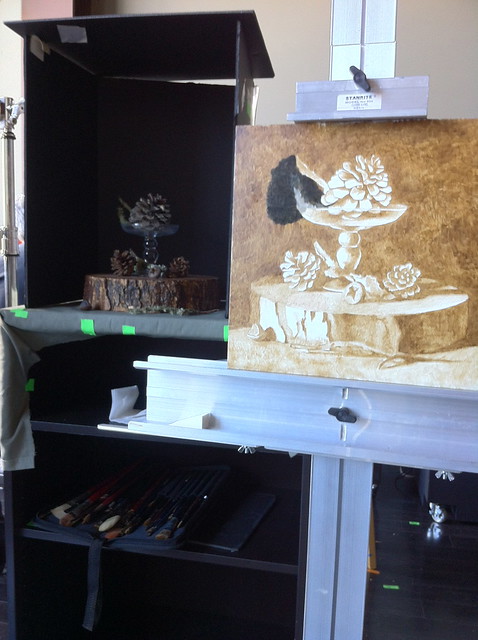
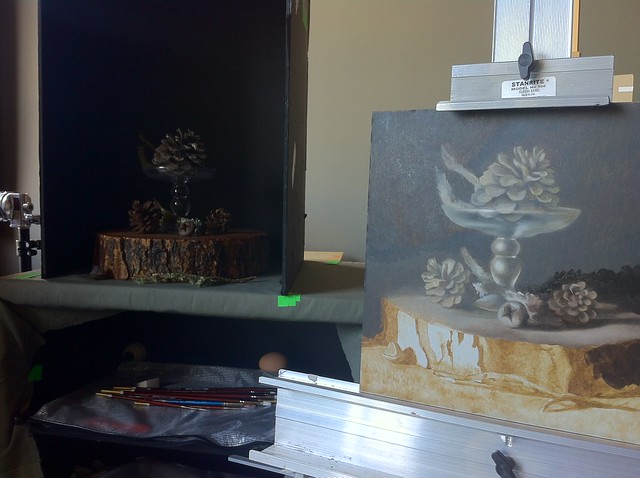
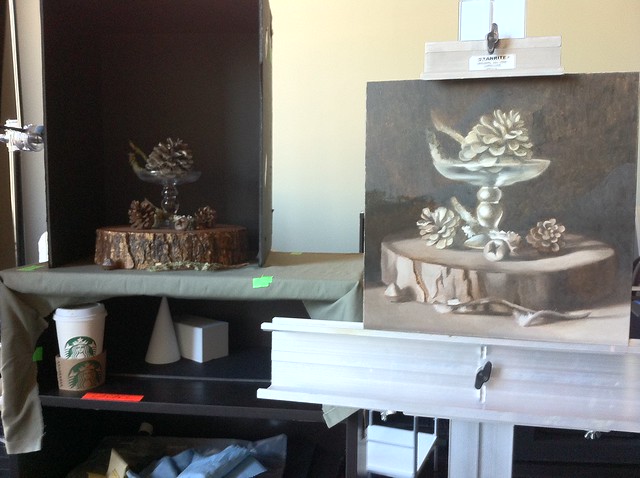
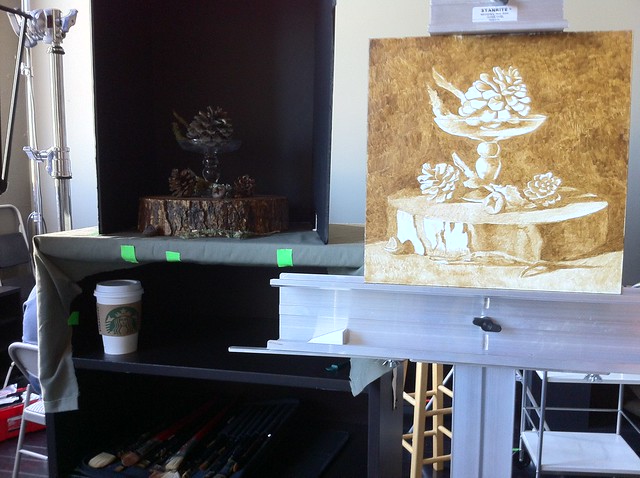
***note: There is an unfortunate glare on some of my photos due to very strong light in the studio. Hopefully you can get a general sense of the scene. I will try to improve my photos for the following posts.
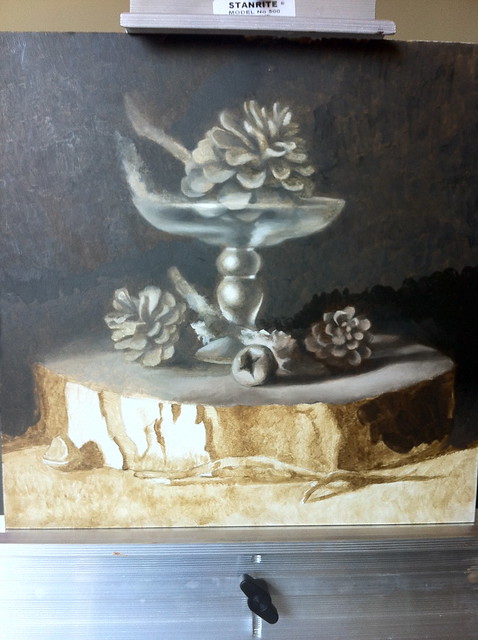
I didn't really know where to begin, so I started on the easiest, the very dark, almost black background against the lighter pinecone, which is the focal point of my painting. The two sticks that move into the dark area are covered with lichen and heavily textured. Sadie instructed me right away to paint these almost blurry, soft and to avoid all detail, focusing only on the general effect of the value on each area against the black background.

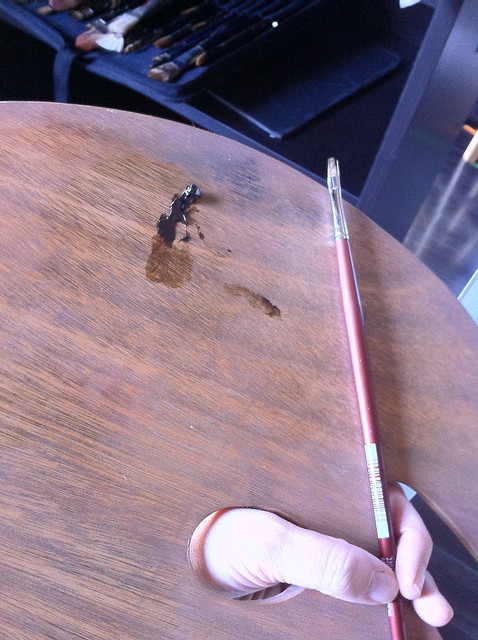
In my last post I used the underpainting medium more often, dipping the edge of the brush into the medium and then sopping up the excess with a paper towel. In this stage, it is not necessary to do that since the paint will be opaque. The point is to get the paint to flow off the brush and on to the panel, but not have it so fluid that it is transparent and drippy. Most of the time I did not need more than a tiny bit on my brush. Once that bit was mixed into my paint as I worked, the paint seemed to be fluid enough to continue to work for quite awhile.


************************************


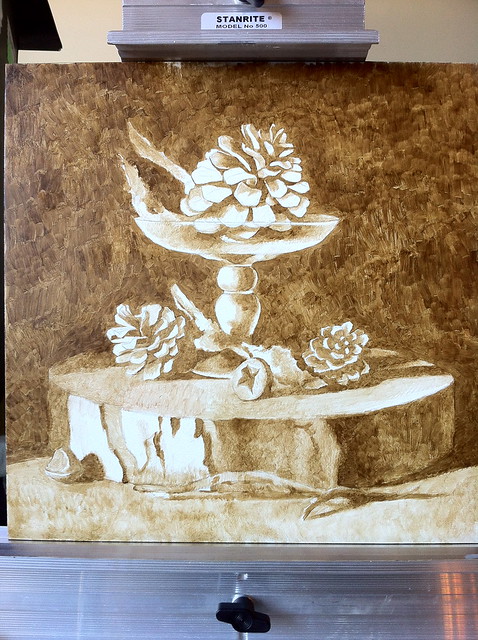
It is difficult to leave the highlights so large knowing they are not like that in reality. They jump off the panel every time I look at this underpainting, forcing me to be patient for the subsequent layers.

**********************
Method
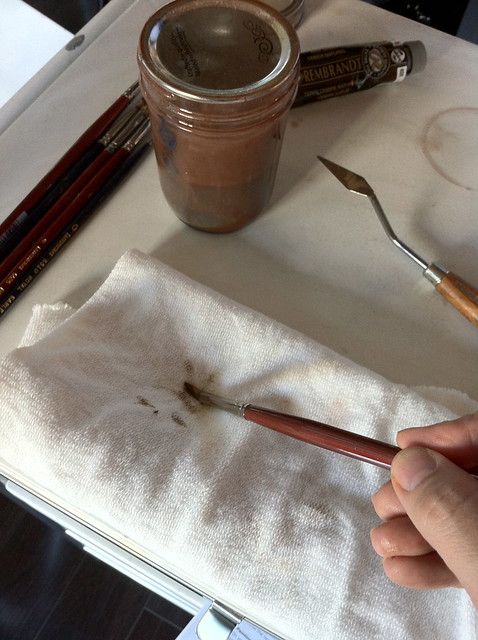
This stage continues to make use of underpainting medium as a way to make the paint flow if it is not fluid enough. However, I found that I rarely used it, probably only a few times at the start, and not very much. In my last post I neglected to mention the recipe of the underpainting medium. Here it is:
Recipe: 2 parts linseed, 1 part odorless turp
***note: use fine sharpie to mark parts on side of glass, mark top of jar "underpainting medium". I am using ball canning jars.

Use either Turpenoid or Gamesol brand Odorless Mineral Spirits. There are many linseed oils available.

************************************
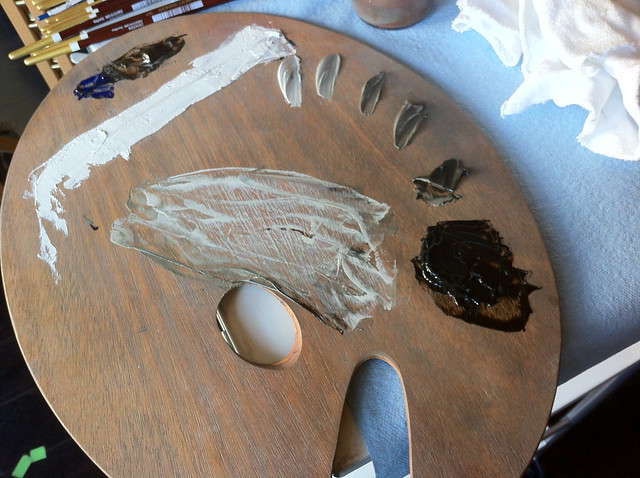
Value String
The purpose of mixing up a value string is so that you don't have to mix up values on the fly while working. It saves a lot of time to premix seven values moving from pure white to black, as you can see in the photo below. Sadie instructs us to use seven values, which I find to be more than enough to describe the tonal range of any given subject.
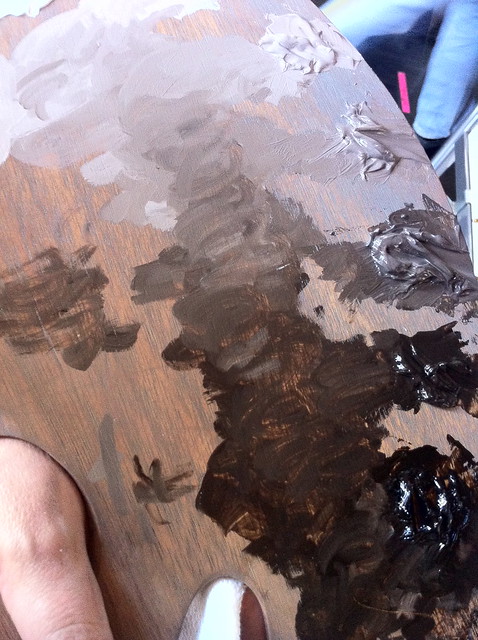
Also notice how the white paint is spread out in a thin strip. This is so that I can get clean pure white when I need it. Below is what the color looks like after I've been painting awhile. You can see how warm the neutral grays are.
************************************
Technique
***note: There is an unfortunate glare on some of my photos due to very strong light in the studio. Hopefully you can get a general sense of the scene. I will try to improve my photos for the following posts.
I didn't really know where to begin, so I started on the easiest, the very dark, almost black background against the lighter pinecone, which is the focal point of my painting. The two sticks that move into the dark area are covered with lichen and heavily textured. Sadie instructed me right away to paint these almost blurry, soft and to avoid all detail, focusing only on the general effect of the value on each area against the black background.
In my last post I used the underpainting medium more often, dipping the edge of the brush into the medium and then sopping up the excess with a paper towel. In this stage, it is not necessary to do that since the paint will be opaque. The point is to get the paint to flow off the brush and on to the panel, but not have it so fluid that it is transparent and drippy. Most of the time I did not need more than a tiny bit on my brush. Once that bit was mixed into my paint as I worked, the paint seemed to be fluid enough to continue to work for quite awhile.
It took me awhile to get used to painting this way. I wanted to get into every little value shift and fully describe everything. Sadie pushed me to move on quickly. In fact, Sadie instructed me to make all of the painting soft with no sharp edges anywhere in the painting, at all, setting up the painting for selective focus in later color layers.
I wasn't able to finish very much of the grisaille that first day and had to stop. Sadie instructed me to avoid stopping for the day on a contour, explaining that paint will form a hard edge when it dries, making it difficult to soften in the next session and in later layers.

Unfortunately, that is exactly where I stopped for the day. As a consequence, I will have some difficulty in making those edges soft. This is what practice is for, though!
************************************
Next Session
I began the next session by applying a very thin coat of linseed oil on the open grisaille, taking care to not apply too much as the the oil will slowly drip. To make sure I did not apply too much, I wiped off the coat of oil with a blue "shop cloth", which made the layer extremely thin.
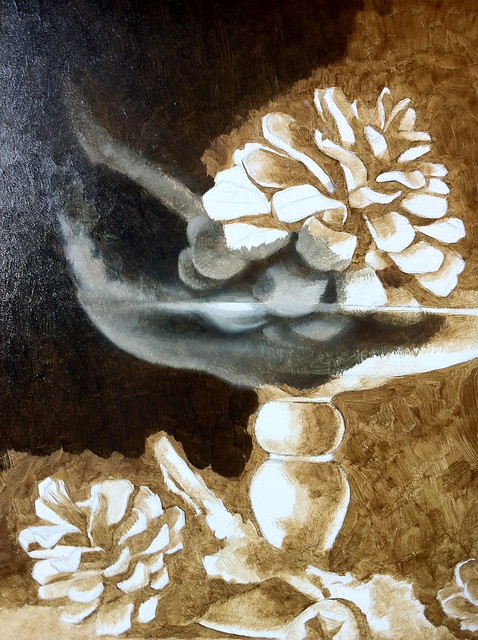
The highlights on the glass piece are in reality MUCH smaller than they are depicted here. Sadie instructed me to make a large "glow" around the highlights, blurring out the edges so that in later stages I can work up to making the highlight soft and luminous, working up to the point of light rather than dotting on opaque paint.
The highlights on the glass piece are in reality MUCH smaller than they are depicted here. Sadie instructed me to make a large "glow" around the highlights, blurring out the edges so that in later stages I can work up to making the highlight soft and luminous, working up to the point of light rather than dotting on opaque paint.
It is difficult to leave the highlights so large knowing they are not like that in reality. They jump off the panel every time I look at this underpainting, forcing me to be patient for the subsequent layers.
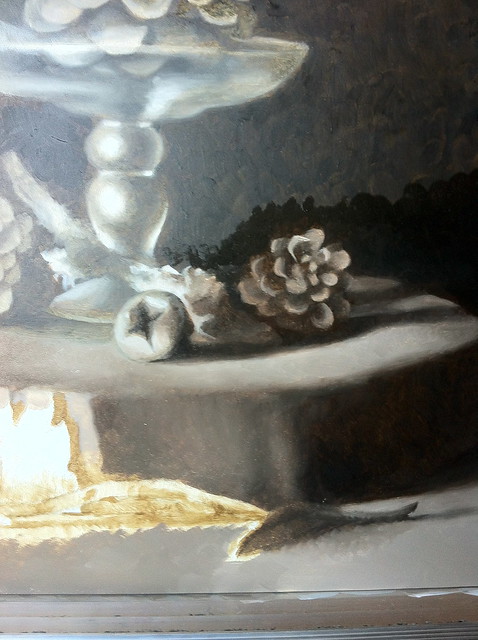
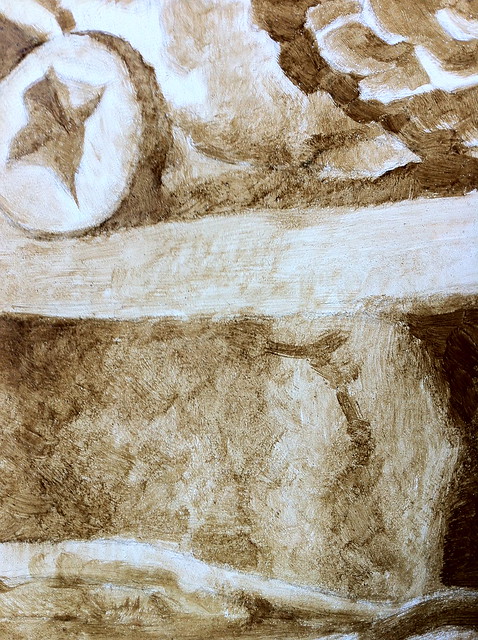
After painting the glass and the pinecones, I began working on the heavily textured tree slice that I am using as a base. Sadie told me that instead of worrying about all the texture, to just paint the large value shifts from one end to the other, capturing the effect of light and keeping the edges soft.
In this photo below you can see how small the highlights are on the glass pedestal. Also note how transparent the shadows are in the painting.
Sadie instructed me to paint the left side of the tree trunk base lighter than the value actually is. I painted the entire left side around a value 2 or 3 in order to get a sense of light in the painting. Also, instead of painting the shadow areas opaquely, they are painted thinner with less paint. I concentrated on opaque lights rather than building up a lot of paint in the shadows.
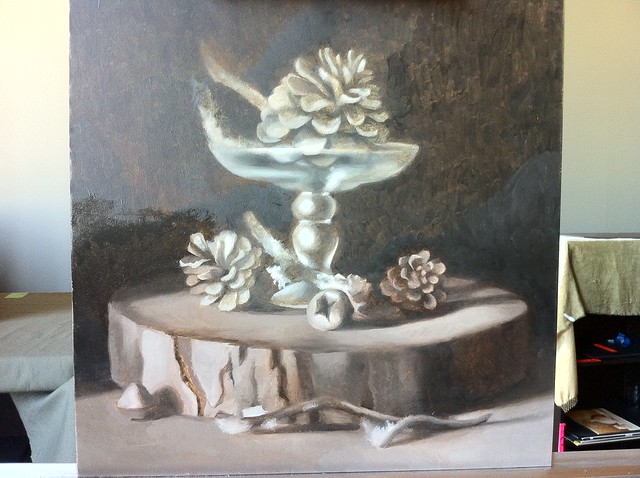
Below is finished closed grisaille underpainting. Because I worked on the grisaille more than one day, my warm-grays do not match precisely, even though I tried to be accurate when I mixed up my value strings. Since the underpainting will be completely covered, this will not matter, as long as the passages lean toward the warm rather than cool.
I had about a week in between sessions. The painting was quite dry by the time I began the color. If painting at home continuously, make sure the grisaille is completely dry, either one or two days, depending on the humidity. Do not start the color layer if the grisaille is not dry.
**********************


