Pages

1/28/2019

"Earth", "Sun", "Moon" Mini Series/ Process

For quite awhile I've been kicking around the idea of a series of paintings having to do with our solar system in relation to earth. Although I have a lot of ideas, I wanted to start off with a really small series that included either animals or insects each relating to the Earth, the Sun, and the Moon. After a lot of sketching and thinking, I landed on a cicada, a bee, and a moth. I chose these insects because cicadas hibernate in the earth for many years, bees are active in sunlight hours, and moths are nocturnal.

I also wanted these to be illustrations rather than scientific studies of any specific species. It was really a challenge...I messed around with embellishing each insect with symbols and landed on a few, but then altered those in the final paintings. 

All of these are drawn on heavy weight duralar vellum, a surface I really like for graphite studies. The warm tone you see underneath is a table top.


I gilded each 6x6 panel in three metal leafs, copper to represent the Earth, Gold to represent the Sun, and Silver to represent the moon. (I ended up double gilding the copper panel to remove the seams you see in the photo)


I should note here that these panels are all oil gilded rather than water gilded. Oil gilding involves applying oil size and allowing it to dry for a specific time before adhering the metal leaf. Water gilding is a different process that yields great results, too, and is often used for making very slick and shiny surfaces, which I wasn't necessarily interested in for these little pieces. Also, I gilded the panels straight onto a white gessoed surface instead of applying a base color (typically called a "bole"). 

I scanned my drawings, made line drawings in photoshop, then printed out the designs to the specific size I needed, and then transferred them to the gilded panels. This time I used white graphite transfer paper so that the line work could show up against the metal leaf. 


I painted a closed grisaille underpainting first so that paint adhered to the surface before adding color. I'm glad I did because the metal leaf was slick to paint on, requiring some layers of paint as a base before adding color.


One really cool thing about the metal surface is that it reflects light even in the middle of the night with all of the lights turned off. I tried to capture this a bit. (Sorry for the shaky cam!)


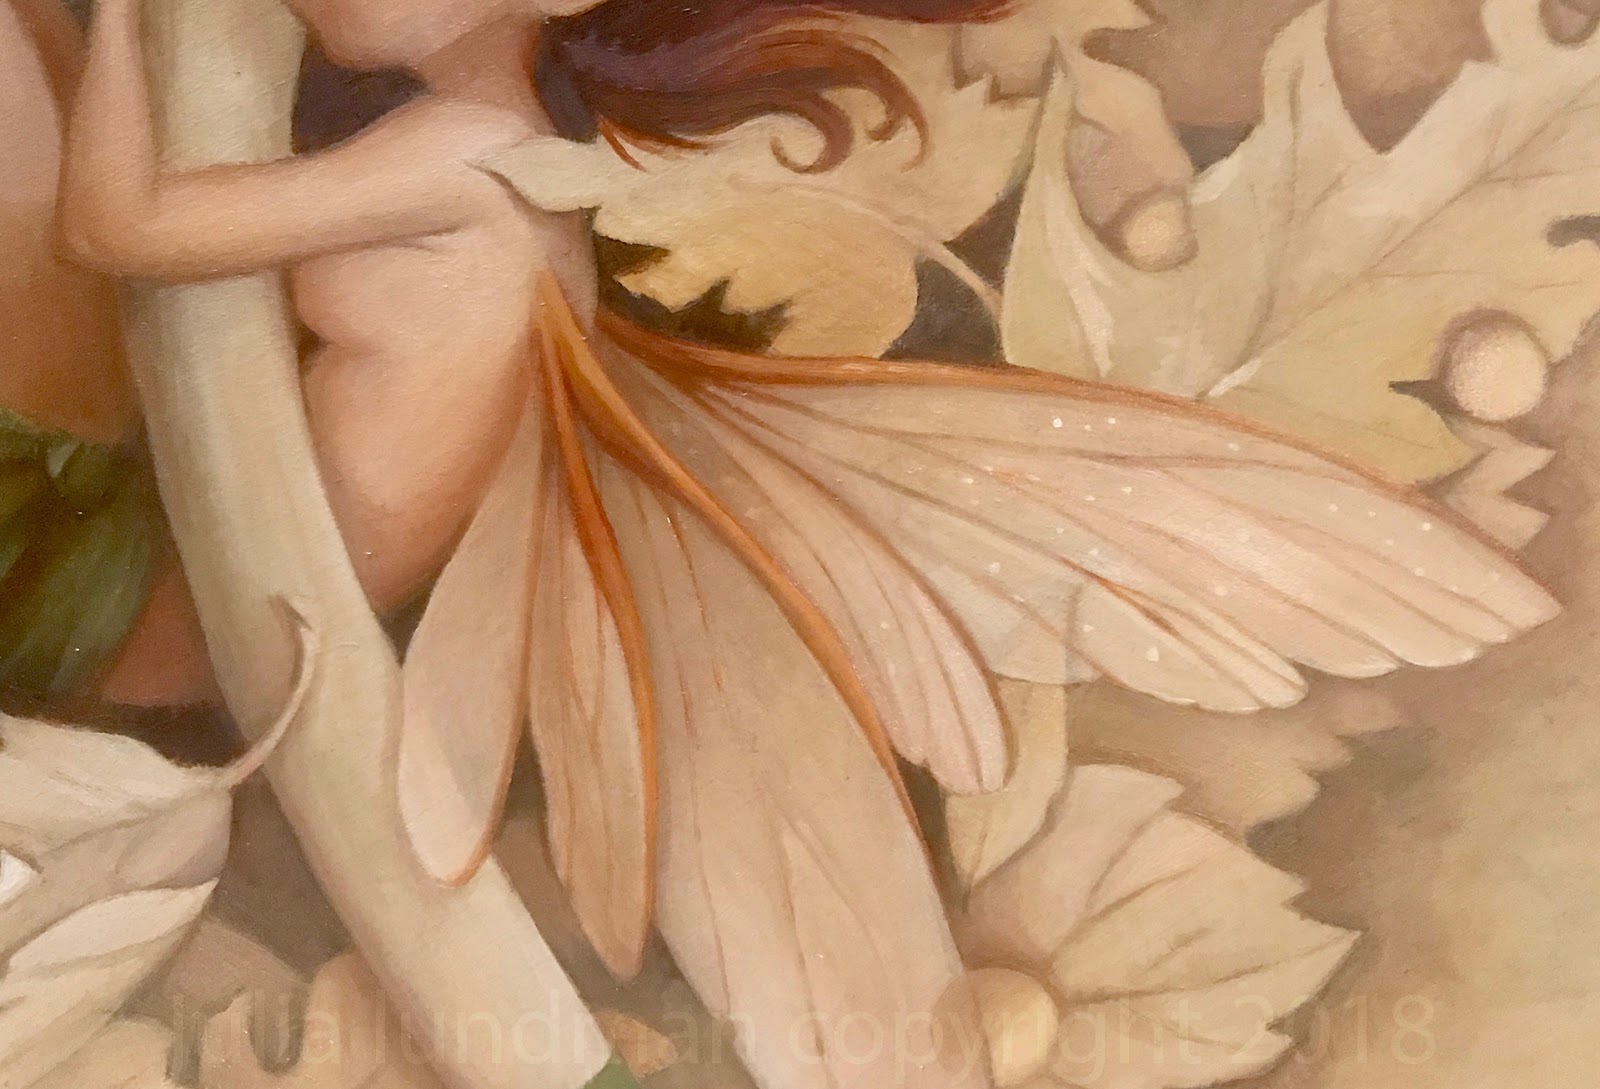
After the grisaille under paintings were finished, I moved to detail color work. I found with each one that balancing the transparency of the wings for "Earth" and "Sun" against the metal leaf was quite difficult. I probably spent more time working on the wings than any other aspect of each painting. It was also difficult to gauge the color structure while painting because the shimmery metal leaf would change during the day and change the nature of the color. In some cases I repainted the color layer twice in order to adjust.


Varnishing these paintings took a few tries, as well. I ended up reapplying the varnish and stripping it a few times. I think a matte varnish works really well with these. The metal leaf still looks shimmery and the painted surfaces end up having a nice matted quality that contrasts well.

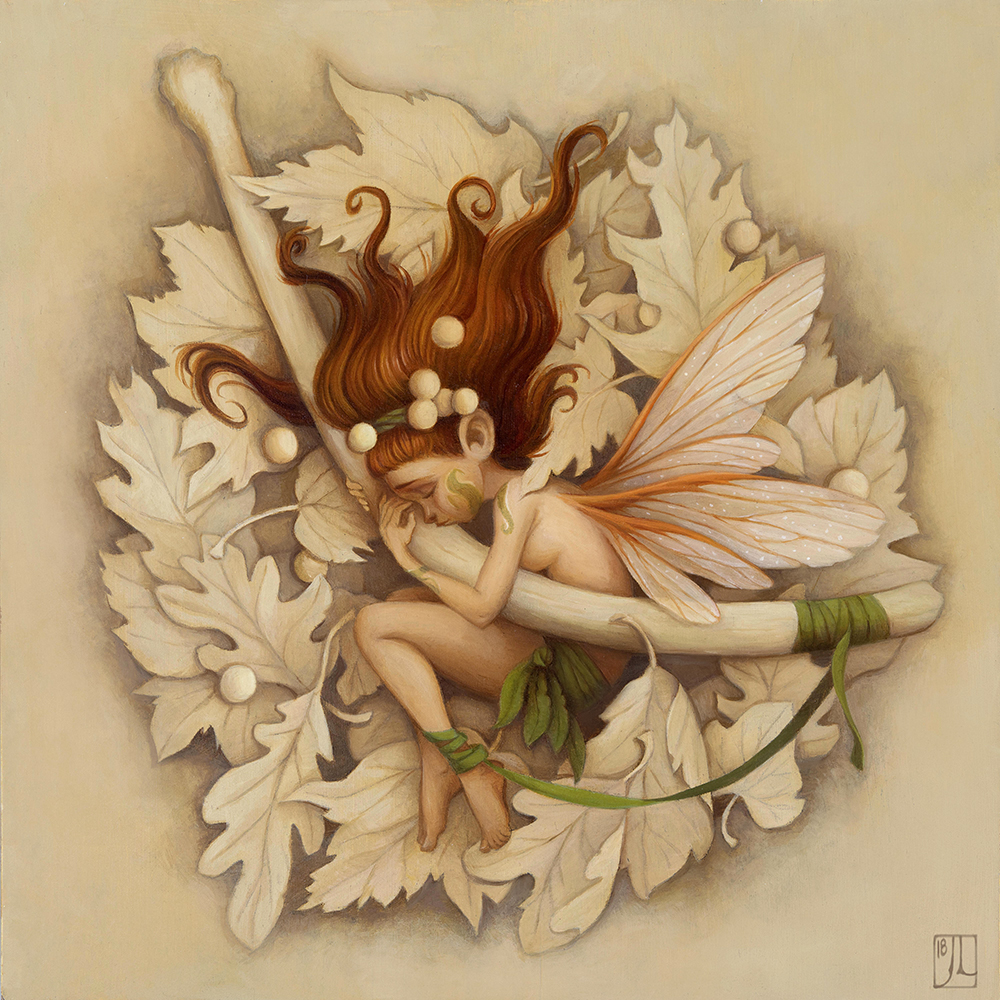
The finished paintings, "Earth", "Sun", "Moon".


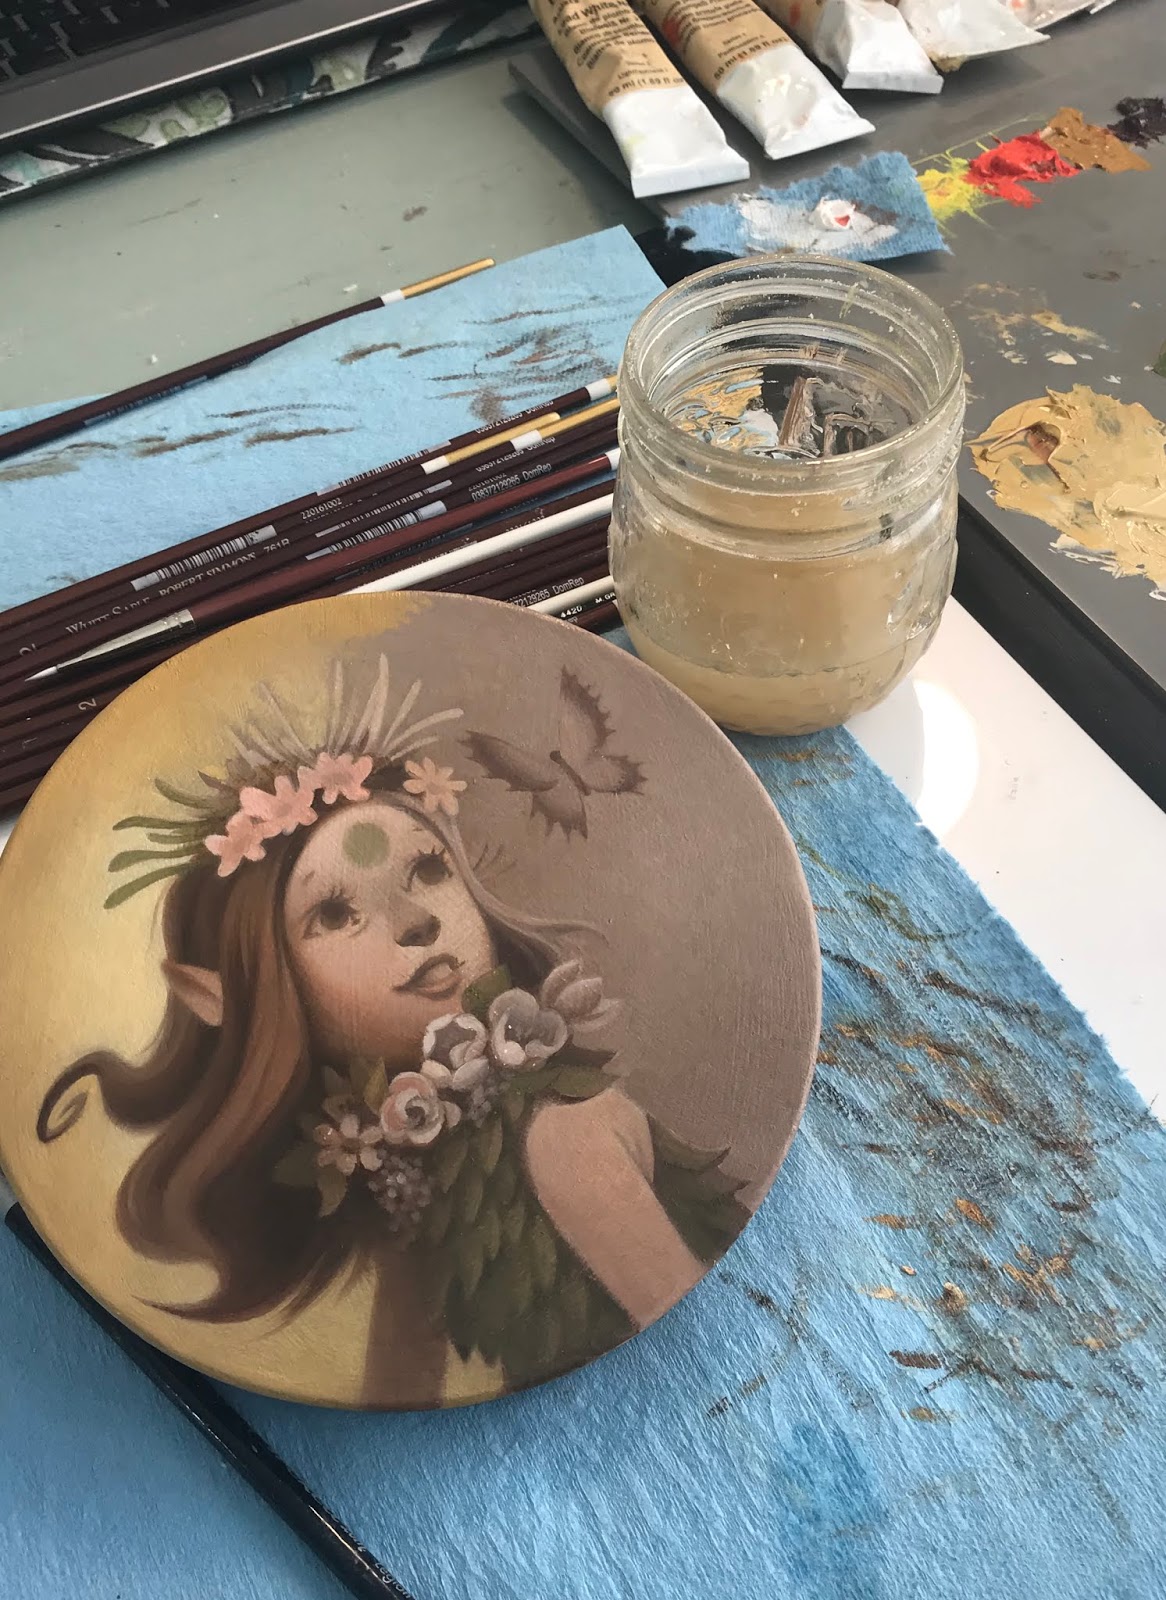
I plan to continue this series with larger pieces later this year, which I am very excited about... For the mean time, I am in the midst of two more gothic themed paintings, one of which you can follow along with on instagram and twitter:


Thank you for reading!

1/24/2019

"Ancient Grief" plus process

Participating in Inktober for the past two years has really been helpful in improving my inking techniques and exploring new ways to render a subject in ink, and it has also been pretty great for generating ideas that I'd like to develop further. This painting, "Ancient Grief" came out of a series of sketches I did as prep for Inktober while I was thinking about a connective narrative for all of the pieces for the month.


"Ancient Grief", oil on gessoboard panel

For the past few years I have been waking up around 5:30 am. After I get some coffee, I spend a few hours drawing in my sketchbook in the living room, usually while listening to ambient music on my headphones. I've found that if I don't think too much about what to draw, subjects begin to tumble out of my mind. This entire series of sketches was one of those mornings. 

Apparently I am not alone in this experience. Many artists and writers dedicate their early morning hours to their craft and have reported it as a unique period of productive creativity. This short article sums it up pretty well: Why You Need to Write First Thing in the Morning.  

Early morning sketching has therefore been at the very core of finding images that resonate for me and is a sacred part of my process. 


Most of these sketches ended up being a part of a larger narrative that I used for my Inktober pieces, a story that I've not finished. I wrote about my last inktober series here.

But one sketch in particular stood out as something I'd like to paint rather than ink; it had an extra sense of mood and emotion that brought it into a different realm than the other sketches. I developed it as a larger sketch in order to figure out more details and think about a composition that might work as a painting.


After the sketch was finished, I transferred it to a panel using saral graphite transfer paper. (Next time I would rather use an oil transfer for this step, which I'll talk about that in later posts.) This time instead of painting on a white board, I decided to tone the entire canvas with raw sienna, yellow ochre and white, and then painted in the rough shadows before going into color.


For the palette, I chose a pretty limited palette of Natural Pigments Lead White #2, Lead Tin Yellow, Yellow Ochre, Cad Orange, Raw Sienna, Transparent Red Oxide, Burnt Sienna Raw Sienna, and Italian Green Umber. 


Originally, I was going to use the exact same limited palette of custom mixes I made for my Seasons series (as described in my last post), but I thought instead I could just create the mixes in a close enough range to match that palette on the fly. 

Also, I wanted the keep the focal point on the emotion of the scene and didn't want to distract from the color of the character. I wanted the fairy to have rich red hair and pale skin, similar to some of the Pre-Raphaelite paintings I had just seen at the Palace of Legion of Honor in San Francisco. 


This painting by Dante Gabriel Rossetti, "Bocca Baciata", 1859, had such a beautiful contrast in the hair and skin that I wanted to see if I could create a similar contrast and delicacy in my painting.

Although she is laying on a bed of fall leaves, I thought I would depict them as a monochromatic drawing rather than paint them in full color. Originally I wanted the leaves to be much more loose and sketchy, but after I painted the fairy and the bone, it seemed like I needed to tighten up the leaves...so they became sort of a monochromatic painting in the end.


Hard to believe, but fairy wings and insect wings are really time consuming to paint. At first I thought they might be the easiest to paint, requiring just a few highlights and accents to make them feel transparent. However, I ended up fiddling around with the details quite a bit to get them to look shimmery, and honestly I still feel like they aren't shimmery enough. (This reason alone is probably why I will make a billion more fairy paintings...)

Since this painting is connected to the story of my inktober pieces, I am going to continue along with these paintings and more inks throughout this year. Stay tuned for more and follow along! 


If you've made it this far down the page, thanks for reading! 


1/22/2019

"Seasons" series/ Process


Earlier this year I finished these four small paintings. It was a huge breakthrough because I spent so much time planning and figuring out technical details (process outlined below). More importantly, they represent an aesthetic I've been trying to figure out for some time, which recalls my love of fantasy inspired by illustrators in literature and history. All of these subjects have been deep influences on my interests throughout my life, yet I never quite knew how to channel it all.  

Below is my process. For those interested, feel free to ask any questions. I am happy to give more details if they help.


Seems like video is the best way to view these. 


****************************************************************
PROCESS

The first thing I did was work up some quick loose sketches in my sketchbook, then these studies below. 


Because I wanted my paintings to have gold and silver details, I needed to carefully consider the palette. I scanned the drawings and then played with color palettes in Photoshop before I actually painted them. I really liked a muted palette against the brightness of the gold and silver and went with it. 

I thought about making some custom black frames, but decided against it, at least for now.


***************************************************************
Because the drawings were scanned, all I needed to do was print them out to the correct size for the transfer. I transferred the drawings using saral graphite paper on to panels that I gessoed and sanded a few months before. 


The method of painting I use is called indirect oil painting. It is the oldest form of all the oil painting techniques developed by Dutch painters, sometimes also called the Flemish method. Indirect oil painting involves a few layers of underpainting in warm tones, which is called a grisaille. This first layer, the "open grisaille", is always really unattractive looking, but it is important to get some paint on the surface so that subsequent opaque layers can adhere to the panel. 


After the first open grisaille, I began the second grisaille, which uses white paint and is entirely opaque.


For all of these paintings, I designed the palette to be limited to a few custom mixes. 


My limited palette comprised of mixtures I made from a typical palette of colors. 


After coming up with the base color palette and marking down how I made the mixtures, I began the color glazing stage, following the color mock ups I did in Photoshop, which I have in front of my on my ipad at my desk. 

In regards to technique, glazing color on top is fairly easy, it is just takes a few layers in order to cover the underpainting underneath. I love this stage the most. It finally feels like everything is coming alive.


After they were finished, I used a matte varnish rather than a glossy varnish. I wanted to make sure the metal leaf details didn't compete with another shiny surface. 

And this is the part that took me literally months to figure out...gilding.

I had so many frustrating experiments on test surfaces that were not working the way I needed them to. Gilding on oil paintings, it turns out, is a little more involved than gilding on paper surfaces. I see a lot of artists using gilding in their work, but it is not at all easy when you want a specific design and are working with oil paint, which tends to want to grab the metal leaf, making brushing away the excess a nightmare.

I ended up taking a class with Lynn Rutter on gilding techniques. I am so glad I did. I learned a huge amount in information in two days that answered a lot of questions and provided important information about how to make sure that materials like oil paint and varnishes underneath the gilded surface interact well and archival for a long time. For all of the gilded details, I painted used twelve hour oil size and then used various metal leaf when the size was ready. Because some metal leaf tarnishes, I also learned about the importance of using shellac (and which kind) to create an isolation layer. 


These are the samples of gilded surfaces we learned about in Lynne Rutter's two day weekend class.


I used twelve hour size. Timing it is important, so you have to make sure your schedule is clear twelve hours later, otherwise the gilding window closes and you have to start all over again. The photo above is what it looks like while it's drying.

After that, brushing it off was fun, too, except that sometimes the edges weren't as crisp as I'd like them to be. I had to double leaf the details in some places. 


The finished piece.

Much more to come in 2019!
 If you've made it this far down the page - THANK YOU.