I am breaking up this stage of the process of my still life painting into two separate posts. I am first sharing my technical notes about drawing my set up and Sadie's approach. In the second post, I have done extensive research into many of the various drawing methods available, and I will provide my notes and references for further reading. Even though I have been working as an illustrator and painter, I found it very useful to take the time to read through and understand what methods are available and why an artist might choose one over another, or even use a combination.
********************************************
********************************************
First part/ My class notes, The Drawing:
Sadie teaches two methods of drawing, construction and straight line block in. While drawing, I am also taking into consideration concepts of organic structure, which she also teaches (more on this in the second post). The straight line block in method is new to me regarding still life painting, but after having tried it a few times, I have found it a very accurate and useful way of translating what I see on to the 2D surface of the paper.
We draw on heavy grade vellum taped to a few sheets of paper and foam core. All of this of course is on the easel. I assume we are using vellum and not a thinner tracing paper because the vellum holds up to lots of erasing. Pencils need to be razor sharp, and we use an kneaded eraser and "tuff stuff" eraser pencil to erase angles and construction lines as we progress.
It is important to know that this method *does not* use sight size. (more on sight size in the second post) You place the easel close enough so that you can see your subject clearly, being careful not to move too close. If so, you will violate the cone of vision. The cone of vision, 60 degrees in total, is the degree to which your vision can see without distorting on either side. A good way to tell if you are painting too close is to observe whether or not you need to move your head from side to side in order to view the entire set up. If you do, move back until your head can take in the entire set up.

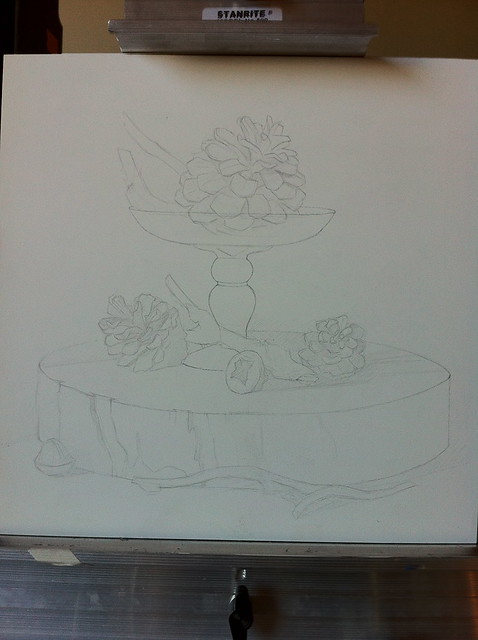
My photo is a bit dark. In order to record this light drawing with the camera, I needed to darken the photo a bit, especially since it is on vellum.
At this point, instead of drawing with the straight line block in, Sadie instructed that I construct the glass pedestal symmetrically, and also the large wood tree slice that I am using as a base. To do this, I took my drawing off of my easel got out my t-square.
This step is quite revolutionary to me, and different from anything I have learned in the past about painting from life - construction. While I have worked in the animation industry and as an illustrator in gaming, I have always used construction methods to compose drawings, but I have never used it for observational painting. In the past, I simply blocked in shapes with straight lines and shadow shapes before painting. After having tried construction in this way, I've realized it is an incredibly necessary way of composing man made objects in any still life.
We draw on heavy grade vellum taped to a few sheets of paper and foam core. All of this of course is on the easel. I assume we are using vellum and not a thinner tracing paper because the vellum holds up to lots of erasing. Pencils need to be razor sharp, and we use an kneaded eraser and "tuff stuff" eraser pencil to erase angles and construction lines as we progress.
It is important to know that this method *does not* use sight size. (more on sight size in the second post) You place the easel close enough so that you can see your subject clearly, being careful not to move too close. If so, you will violate the cone of vision. The cone of vision, 60 degrees in total, is the degree to which your vision can see without distorting on either side. A good way to tell if you are painting too close is to observe whether or not you need to move your head from side to side in order to view the entire set up. If you do, move back until your head can take in the entire set up.
Remember to always work with your feet (or what you are sitting on) taped so you can keep track of your point of view.
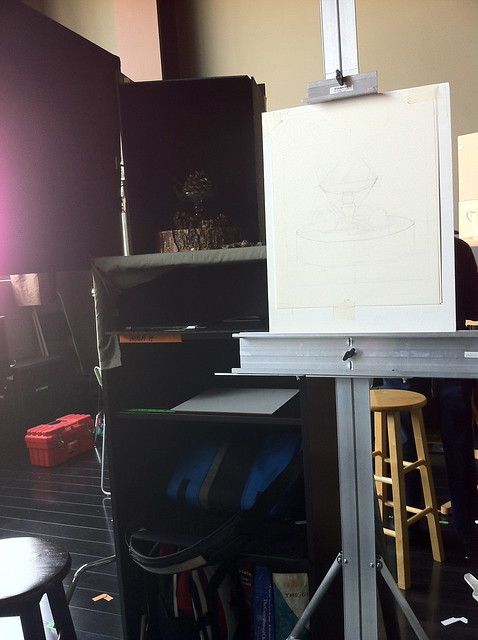
For this still life, I am working about this far away from my set up, about two feet, which is far enough so I can see everything but also close enough so I am able to see small details like highlights and textures:
The first step in drawing the set up is to trace the size of the panel on to the vellum. After that, we began figuring out the general placement of the still life on the paper using angular lines to define all of the outer most edges of the still life, referred to as "the envelope". In the past, when life drawing, I have used this method for placing a figure on the paper or a head if it is a portrait, although I did not realize there was a term for it. The envelope makes sense; there needs to be some way of making the first marks on the paper, and this seems to be the best.
Unfortunately I did not take a photo of this stage, so I have scanned an example of the envelope from Juliette Aristides book, "Lessons in Classical Drawing", page 52. (an excellent book - highly recommended)
 The student was drawing an animal skull. I noticed in this drawing Aristides must have had her student first divide the paper into halves, making plumb lines in order to find the center. I have also found this very useful in the first steps when trying to place a complex object on to the paper, especially when there are several objects in a still life. I don't tend to use this for life drawing, although I imagine it would be helpful.
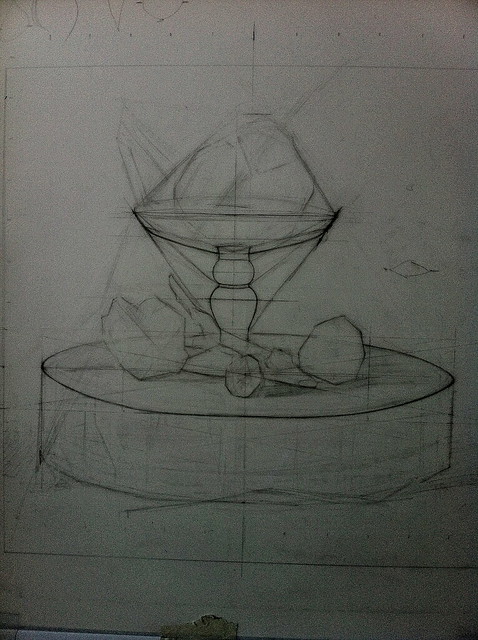
After figuring out the first lines I progressed from there to find the placement of each object. I found that it was helpful to use a gesture of each object and lightly draw in where I thought it might be. After that, I checked the placement by holding up a knitting needle to find the angles of a particular object and noting that on my drawing. I also noted where the bottom of that angle hit another object. By doing this over and over, I eventually found the placement of each item in relation to each other.
Here you can see several construction lines, although many were erased at this point.
For this still life, I am working about this far away from my set up, about two feet, which is far enough so I can see everything but also close enough so I am able to see small details like highlights and textures:
The first step in drawing the set up is to trace the size of the panel on to the vellum. After that, we began figuring out the general placement of the still life on the paper using angular lines to define all of the outer most edges of the still life, referred to as "the envelope". In the past, when life drawing, I have used this method for placing a figure on the paper or a head if it is a portrait, although I did not realize there was a term for it. The envelope makes sense; there needs to be some way of making the first marks on the paper, and this seems to be the best.
Unfortunately I did not take a photo of this stage, so I have scanned an example of the envelope from Juliette Aristides book, "Lessons in Classical Drawing", page 52. (an excellent book - highly recommended)

After figuring out the first lines I progressed from there to find the placement of each object. I found that it was helpful to use a gesture of each object and lightly draw in where I thought it might be. After that, I checked the placement by holding up a knitting needle to find the angles of a particular object and noting that on my drawing. I also noted where the bottom of that angle hit another object. By doing this over and over, I eventually found the placement of each item in relation to each other.
Here you can see several construction lines, although many were erased at this point.
My photo is a bit dark. In order to record this light drawing with the camera, I needed to darken the photo a bit, especially since it is on vellum.
At this point, instead of drawing with the straight line block in, Sadie instructed that I construct the glass pedestal symmetrically, and also the large wood tree slice that I am using as a base. To do this, I took my drawing off of my easel got out my t-square.
This step is quite revolutionary to me, and different from anything I have learned in the past about painting from life - construction. While I have worked in the animation industry and as an illustrator in gaming, I have always used construction methods to compose drawings, but I have never used it for observational painting. In the past, I simply blocked in shapes with straight lines and shadow shapes before painting. After having tried construction in this way, I've realized it is an incredibly necessary way of composing man made objects in any still life.
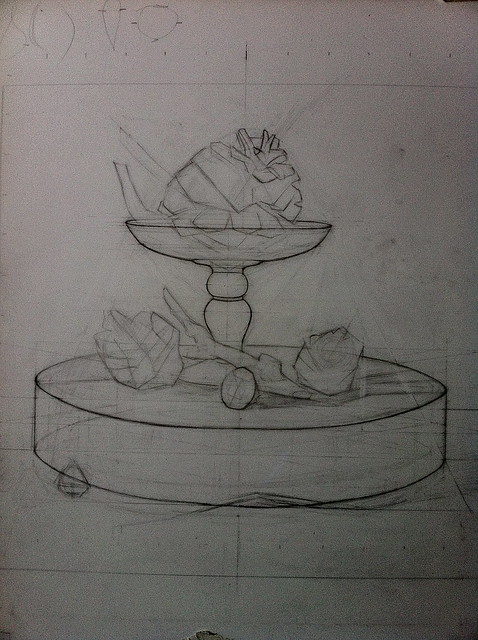
Using my t-square, I made a box around the top of the glass pedestal, and found the exact shape of the ellipse.I also found an ellipse for the bottom wood base. Even though it is an organic object, Sadie said that it would be helpful to draw it as a true ellipse first, and afterward add the asymmetry and variation where I observed it. Here is a good tutorial for how to draw an ellipse.
In all, I spent about five hours or so drawing out my still life using the methods described above - I assume that as I absorb these methods I will be able to work a bit faster. I only took the drawing to about this level, below, finding important key points before I transferred the drawing on to the panel.
Before I transferred the drawing to the panel, Sadie informed me there was too much texture on the surface of the panel. It looked as if a machine had sprayed on the gesso, which is probably the case. (I am using a brand called gessoboard, which is widely available in art supply stores) To get rid of the texture, Sadie had me wet sand the surface with a high grade sand paper with a little turpentine. I worked in a circular motion in small areas until I got a paste, and then wiped that clean from the surface. After an area was finished, I started another area.
To transfer the drawing, I used Saral brand wax-free transfer paper, taping my drawing on the vellum to the panel.
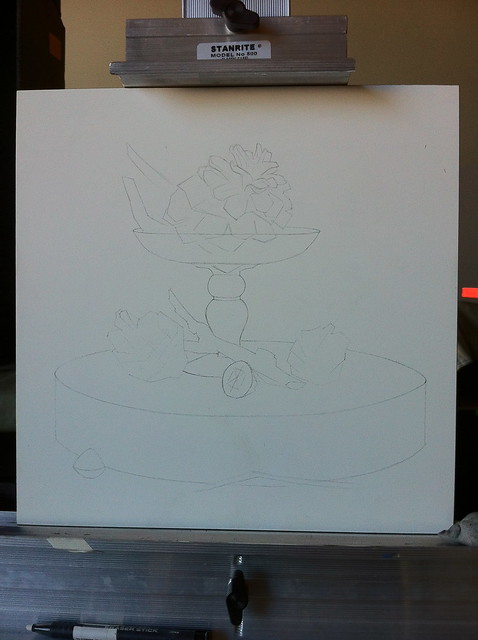
my drawing on the panel after the transfer
After the drawing was transferred, I worked a bit longer, drawing in all the details of each pine cone, making minor adjustments, and refining the entire drawing before varnishing it.
The drawing is then sealed with varnish. The varnish mixture Sadie uses is:
1 Part Dammar Varnish
1 Part Odorless Mineral Spirits
Shake jar gently to mix. Apply a thin coat to drawing using a clean make up wedge, which you can purchase at Walgreens. Remove any lint while varnish is wet by picking up debris with the flick of a corner of the brush. Don't over brush - it soon becomes tacky. Apply only one coat and allow to dry overnight, leaving a full 24 hours to dry.
********************************************
Stay tuned for part two! Thanks for reading!
6 comments:
Thanks so much for sharing, really interesting tips & love your red shoes ;)
I just bought a bunch of those gesso boards as a splurge thinking it would save me time of having to prep the surface, argh! Your still life is going to be really beautiful, love the feel of it already :)
Hi Tracey! Those gessoboards ARE great. Sadie recommended sanding them down, however, to get rid of that texture, which is miniscule but still there. She likes to paint on a perfectly even surface because as you add paint, the layers will build up a texture themselves.
Ha - those red shoes I swear are the MOST comfortable I own!
THANKS - I hope it turns out.......
:)
Thank you Julie! Your posts are really helping me with how I coach my students. I have mostly beginners, and the concise way you describe your processes gives me additional vocabulary!
Oh that's so great Priscilla! I'm so glad you are able to use these notes!!! :)
One thing I just realized I didn't mention about the construction of the man made objects in the still life is that they should be constructed symmetrically first using the usual methods, and then if there are differences or asymmetry in the objects, that can be added later. Sadie does this with all the vessels she paints and seems to get really nice results.
Thank you Julie, this is wonderful info. I too think it will help with my teaching. And any peek in Sadie's studio is a treat! Look forward to post 2
Thank you Julie, this is wonderful info. I too think it will help with my teaching. And any peek in Sadie's studio is a treat! Look forward to post 2
Post a Comment