Continuing on from my last few posts, after I transferred the drawing and varnished it, I began on the open grisaille, the initial application of paint on a white panel, which I documented in detail below as a part of Sadie J. Valeri's Advanced Open Studio.
Before I was introduced to a classical realism, I was completely unaware of the term "grisaille". My fantastic oil painting teacher at the at the American Academy of Art, Ted Smuskeivich, introduced us to an under painting technique which uses a warm earth color painted loosely connecting all the shadow areas in one continuous tone leaving the white of the canvas open to represent the light areas. Even though he did not call this method an open grisaille, I recognize now that is what it is.
It has made me think that there must be many adaptations of the grisaille. My watercolor teacher, Irving Shapiro (who was also the Director of the school), used an under painting method of sorts, painting all the shadows as one large connected shape with warm color transitions in the shadows, painting the lights last. I am sure there are more adaptations and variations out there. I have often read about warm under paintings using different mediums underneath the oil, like acrylic paints and even egg tempera.
At Sadie J. Valeri's Atelier we are learning the full classic method, called the Flemish Technique, which consists of many layers of paint, starting with the open grisaille. The Flemish Technique developed in the early Renaissance when artists were looking for paints that could be manipulated more finely than the quick drying egg tempera. After oil painting in this manner was introduced by Jan and Hubert Van Eyck in the early fourteenth century, it's popularity spread throughout Europe. To read more about the Flemish method and it's cousin, the Venetian method, HERE is an excellent article by Virgil Elliot and a link to his book on classic oil painting HERE.
 The Ghent Alter Piece, Jan and Hubert Van Eyck, 1432
HERE is an excellent website that allows you to select each panel and zoom in to see amazing detail on the paintings. Check it out!
Before I was introduced to a classical realism, I was completely unaware of the term "grisaille". My fantastic oil painting teacher at the at the American Academy of Art, Ted Smuskeivich, introduced us to an under painting technique which uses a warm earth color painted loosely connecting all the shadow areas in one continuous tone leaving the white of the canvas open to represent the light areas. Even though he did not call this method an open grisaille, I recognize now that is what it is.
It has made me think that there must be many adaptations of the grisaille. My watercolor teacher, Irving Shapiro (who was also the Director of the school), used an under painting method of sorts, painting all the shadows as one large connected shape with warm color transitions in the shadows, painting the lights last. I am sure there are more adaptations and variations out there. I have often read about warm under paintings using different mediums underneath the oil, like acrylic paints and even egg tempera.
At Sadie J. Valeri's Atelier we are learning the full classic method, called the Flemish Technique, which consists of many layers of paint, starting with the open grisaille. The Flemish Technique developed in the early Renaissance when artists were looking for paints that could be manipulated more finely than the quick drying egg tempera. After oil painting in this manner was introduced by Jan and Hubert Van Eyck in the early fourteenth century, it's popularity spread throughout Europe. To read more about the Flemish method and it's cousin, the Venetian method, HERE is an excellent article by Virgil Elliot and a link to his book on classic oil painting HERE.

HERE is an excellent website that allows you to select each panel and zoom in to see amazing detail on the paintings. Check it out!
******************************************************************
From Adrian Gotlieb's online glossary: "Term applied to monochrome painting carried out mostly in shades of grey. The use of the French word can be traced only to 1625, since although grisaille painting was done in preceding centuries, it was not referred to as such...at the time of it's origin, in the medieval period, grisaille painting was simply called 'painitng in black and white'"
Grisaille painting was commonly used in the medieval period to imitate bas relief sculpture. In the Flemish oil painting technique, the grisaille functions as an underpainting, first painted transparently in a warm hue that leaves the canvas exposed in the light areas, termed the "open grisaille" and afterwards a second pass termed the "closed grisaille" is painted in opaque warm neutral greys before the final pass of the color layers. This blog post focuses on the open grisaille that I am learning during Sadie's Advanced Open Studio.
******************************************************************
What is "grisaille"?
From Adrian Gotlieb's online glossary: "Term applied to monochrome painting carried out mostly in shades of grey. The use of the French word can be traced only to 1625, since although grisaille painting was done in preceding centuries, it was not referred to as such...at the time of it's origin, in the medieval period, grisaille painting was simply called 'painitng in black and white'"
Grisaille painting was commonly used in the medieval period to imitate bas relief sculpture. In the Flemish oil painting technique, the grisaille functions as an underpainting, first painted transparently in a warm hue that leaves the canvas exposed in the light areas, termed the "open grisaille" and afterwards a second pass termed the "closed grisaille" is painted in opaque warm neutral greys before the final pass of the color layers. This blog post focuses on the open grisaille that I am learning during Sadie's Advanced Open Studio.
******************************************************************
Open Grisaille
Clean brushes before beginning:
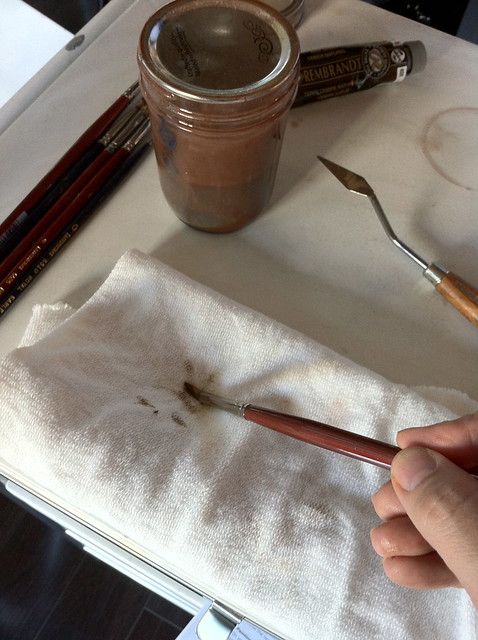
Sadie introduced us to this excellent system of cleaning brushes. This is all new to me. In the past I simply washed my brushes with odorless mineral spirits in between color changes and then used dish soap at the end of the day to clean my brushes. There is a better way to clean brushes - Natural Turpenoid!


I filled a silicoil jar with natural turpenoid and have been using it to wash my brushes at the end of the day, leaving the turpenoid on the brushes. However, it is VERY important to remember when you next begin to paint to clean the natural turpenoid OFF of the brushes before you paint; this stuff is designed to strip paint off and not something you want IN your painting! It is ok to leave the natural turpenoid on the brushes overnight because it will actually protect the brushes. When ready to begin painting, wash your brushes in odorless mineral spirits to make sure they are free of natural turp.
******************************************************************
Brushes:
The idea of the open grisaille is to simply paint only shadow areas and also to have some paint on the panel so that subsequent layers of paint can adhere. Another advantage of creating the open grisaille layer is that you begin to clearly observe the light and shadow areas on the set up.
The first step is to put a small amount of raw umber or burnt umber on the palette. I chose raw umber as my under painting color because it is slightly cooler than burnt umber. My still life set up has a lot of cool earth tones, so I felt this color was a good theme to start with.
Brushes:
From Sadie's painting materials list: "I highly recommend Robert Simmons “White Sable” brushes with the maroon handles and white bristles, the very best for an affordable price.
There is a national shortage of the Robert Simmons brushes, if you can’t get them, please buy any brand of soft imitation sable brushes - not bristle.
Filberts, 2 each of sizes #10, #4, and #1
Rounds, 2 each of size #1"
***note: I bought several in each size. I've found while painting later layers it is useful to have several brushes.
******************************************************************
Painting:
The idea of the open grisaille is to simply paint only shadow areas and also to have some paint on the panel so that subsequent layers of paint can adhere. Another advantage of creating the open grisaille layer is that you begin to clearly observe the light and shadow areas on the set up.
The first step is to put a small amount of raw umber or burnt umber on the palette. I chose raw umber as my under painting color because it is slightly cooler than burnt umber. My still life set up has a lot of cool earth tones, so I felt this color was a good theme to start with.
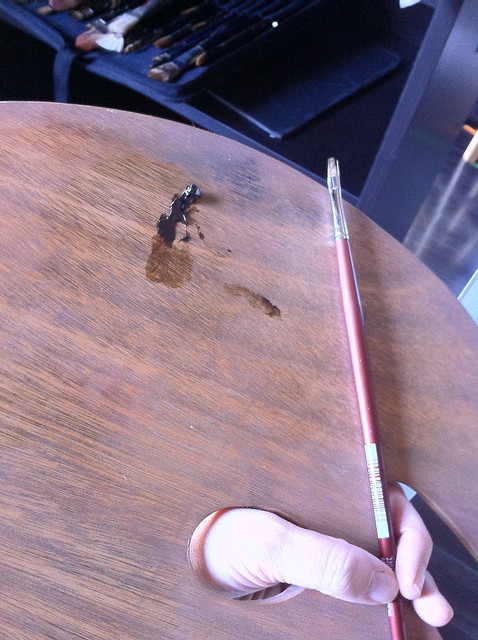
Technique: Rather than applying the paint like watercolor, it needs to be somewhat dry. In order to do this, Sadie instructed me to dip just the tip of my brush into the under painting medium and then on to a paper towel to dry out the brush. It is one of those things that sounds easy when put into words, but when practiced is a bit tricky. Sadie corrected my tendency to over-wet the brush many times while I worked on this stage.
Sadie also recommends using blue shop cloths from a hardware supply store instead of cotton cloths, which I am using here. Cotton or paper towels (even Viva brand) have too much lint, which will build up in the painting. The idea is to have as little lint and dust as possible in each layer of paint.

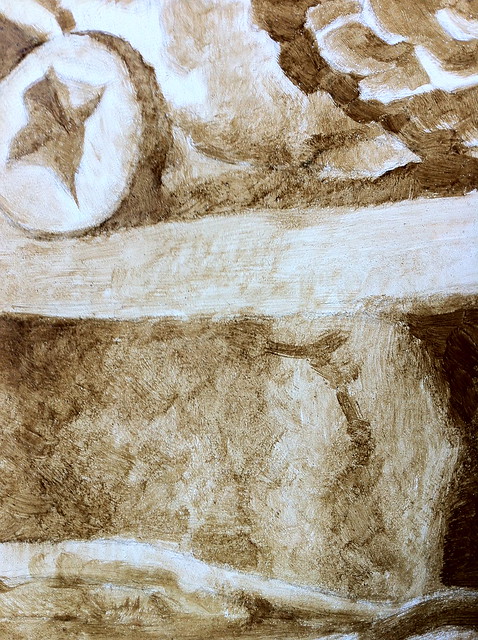
I started with the main pine cone working up from the shadows into the dark background. Do not be tempted to over render and get everything looking nicely modeled. Instead, work on painting the shadows and small amounts of transition areas into the light, leaving the light areas open completely.

The light passages are *not* a thinned down wash of paint, rather are dry brushed paint scumbled lightly on the panel.
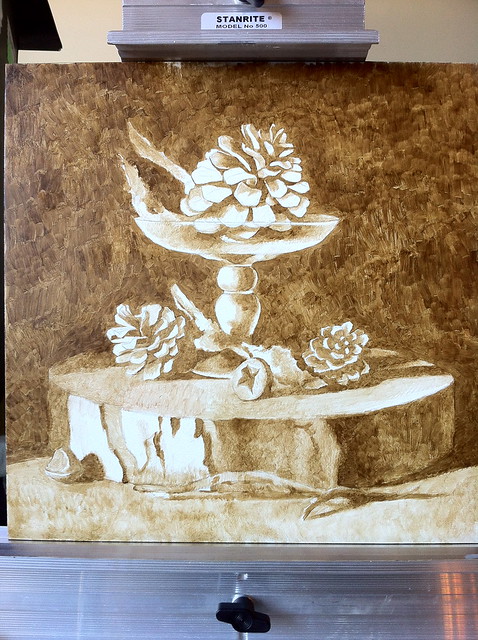
My completed open grisaille.
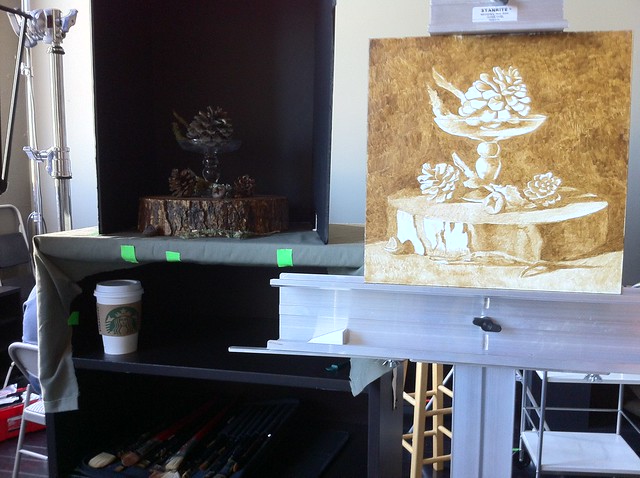
It took me about a day's worth of work to finish this, approximately six hours. At first glance, it might seem like you could blow through the under painting really quickly. However, it is worth slowing down and taking the time to carefully work through each area.
Take a look in the photo below how finely Sadie paints her open grisaille. No wonder her paintings, especially seen in person, are supreme!

"Precise Line, Value and Color, by Sadie J. Valeri", artistsnetwork.com
******************************************************************
***note: As an aside, it is worth mentioning that the Flemish method on wood gessoed panel is excellent for small to medium works, however it becomes impractical the larger the painting is. The wood gesso panel reaches a tipping point in terms of weight the larger it becomes and the technique itself is time consuming; very large works can take several months or more to complete. Also, when working large, the painter can get away with a certain amount of looseness because the viewer tends to stand farther away to view the painting. It was because of these impracticalities that another variation of this technique developed in Venice, called the Venetian Technique, which uses canvas instead of heavy wood. You can read more about it's development by Titian and Giorgione HERE.
Please stay tuned for the next installment, the CLOSED GRISAILLE.
5 comments:
This is fascinating! Thanks for posting. Can't wait to have time to get into oil painting, hopefully with Sadie!
This is fascinating, thanks for posting!! Can't wait to get back to oil painting some day...
and thanks again, Julie!
What varnish do you use after transferring drawing and what oil painting medium for the open under painting?
I use a very thin coat of damar varnish to seal the drawing. Please see the next blog post for details regarding the mediums. You can also visit Sadie's website and find her materials list or sign up for an online class.
http://julialundmanmidlock.blogspot.com/2012/06/advanced-open-studio-with-sadie-part.html
Post a Comment